


Screen deck tensioning is one of the most overlooked yet critical factors affecting vibrating screen performance and media life. Improperly tensioned screen media—whether too loose or too tight—causes premature failure, poor screening efficiency, and increased operating costs. The difference between 3,000-hour and 300-hour media life often comes down to proper tensioning technique. Understanding the principles of screen tensioning and implementing correct procedures can reduce media costs by 60-70% while improving screening accuracy.
Why Tensioning Matters
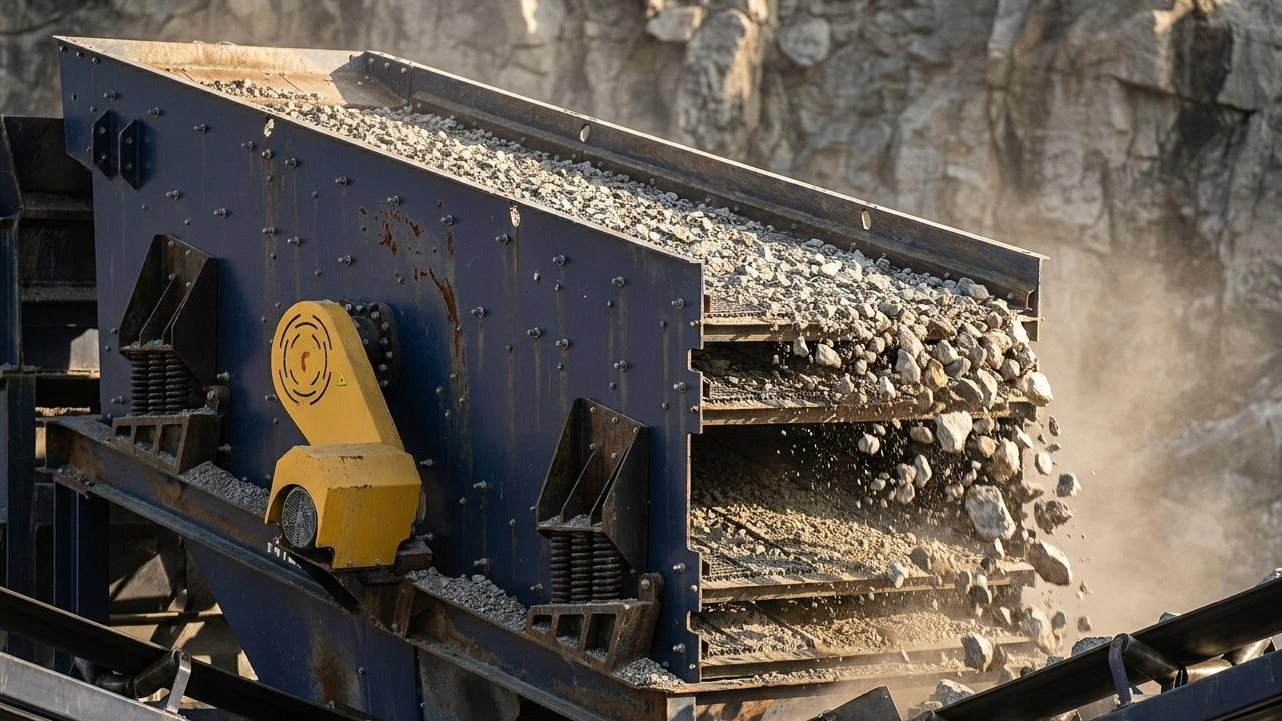
The Physics of Screen Media Under Vibration
Vibrating screen media operates under dynamic loading that differs fundamentally from static applications. During each vibration cycle:
- The screen frame accelerates upward, pulling the media taut
- Material on the deck surface adds additional downward force
- The frame decelerates and reverses, allowing media to relax
- Media oscillates between tension and compression states
This cyclic loading occurs 750-1,500 times per minute (typical vibrating screen frequency). Media must maintain consistent tension throughout this cycle to perform effectively.
Consequences of Improper Tension
| Condition | Immediate Effects | Long-Term Consequences |
|---|---|---|
| Under-tensioned | Media flutter, uneven material distribution | Rapid fatigue failure, hole elongation |
| Over-tensioned | Restricted vibration amplitude, stress concentration | Tearing at edges, frame damage |
| Uneven tension | Material flow to low-tension areas, poor separation | Localized wear, premature failure zones |
| Correct tension | Uniform vibration, proper stratification | Maximum media life, consistent product quality |
Understanding Different Media Types
Woven Wire Cloth
Woven wire cloth is the most common screen media type, available in various weave patterns and wire diameters.
Tensioning characteristics:
- Requires significant pre-tension (3-5% elongation typical)
- Tension relaxes over initial 24-48 hours of operation
- Requires re-tensioning after break-in period
- Tension measurement: 15-25 kN/m for standard applications
Critical factors:
- Warp vs. weft direction has different stretch properties
- Crown (camber) affects tension distribution
- Hook strip condition critical for edge grip
Polyurethane Panels
Polyurethane panels offer excellent wear resistance with lower tensioning requirements.
Tensioning characteristics:
- Lower pre-tension required (1-2% elongation)
- Temperature-sensitive—cold material is stiffer
- Retains tension better than wire over time
- Modular panels reduce tension concerns in many designs
Critical factors:
- Allow thermal stabilization before final tensioning
- Cross-tension bars prevent panel lifting
- Edge seal prevents undersize material bypass
Rubber Panels
Rubber panels provide excellent impact and noise absorption with unique tensioning requirements.
Tensioning characteristics:
- Lowest pre-tension requirement (1% elongation typical)
- More temperature-sensitive than polyurethane
- Creep under constant load—tension relaxes continuously
- Requires more frequent re-tensioning checks
Critical factors:
- Over-tensioning causes tearing at apertures
- Temperature cycling affects tension—check during steady-state operation
- Bolt patterns must distribute load evenly
Modular Screen Panels
Modular systems (polyurethane or rubber with integral frames) reduce tensioning concerns:
Tensioning characteristics:
- Individual panels self-contained—no cross-panel tension
- Mounting system must prevent panel movement
- Panel-to-panel sealing critical for efficiency
- Clamp or bolt systems must maintain secure fit
Tensioning Techniques by Media Type
Wire Cloth Tensioning Procedure
Step 1: Preparation
- Inspect deck frame for damage, straightness, crown
- Clean hook strips and tensioning rails
- Verify tensioning bolts and hardware are serviceable
- Position cloth with warp direction along material flow
Step 2: Initial Attachment
- Attach discharge end first (fixed end)
- Seat cloth firmly in hook strip channel
- Pull cloth toward feed end, removing wrinkles
- Attach feed end loosely in tensioning rail
Step 3: Cross-Tensioning
- Start at center of deck width
- Apply moderate tension at center point
- Work alternately outward to both edges
- Maintain uniform tension across width
Step 4: Final Tensioning
- Tighten feed-end tensioning bolts progressively
- Use tension gauge or deflection measurement to verify
- Target 3-5% elongation from free length
- Check for uniform tension (hand deflection test)
Step 5: Re-Tensioning
- Run screen for 24-48 hours under load
- Stop and re-check tension
- Adjust tensioning bolts as needed
- Re-check after additional 48-72 hours
Measuring Wire Cloth Tension
Deflection method (field practical):
- Place 5 kg weight on center of deck panel
- Measure deflection from unloaded to loaded state
- Target: 3-5mm deflection for properly tensioned cloth
- Less than 2mm indicates over-tension
- More than 8mm indicates under-tension
Tension gauge method (more accurate):
- Use screen tension gauge at multiple points across width
- Read tension in kN/m directly
- Compare to manufacturer specification for specific cloth
- Typical range: 15-25 kN/m for most applications
Polyurethane Panel Tensioning
Temperature considerations:
- Install panels at operating temperature if possible
- If installed cold, apply 75% of final tension initially
- Finish tensioning after thermal equilibrium (2-4 hours)
Installation procedure:
- Start at center panel, work outward to edges
- Install each panel with moderate initial tension
- Align panels to prevent gaps or overlap
- Apply cross-tension bars before final tightening
- Torque mounting bolts to specification (typically 25-40 Nm)
- Verify edge seal contact along all panel edges
Re-tensioning:
- Check after 24 hours of operation
- Re-check monthly or per manufacturer recommendation
- Replace mounting hardware if tension cannot be maintained
Common Tensioning Problems and Solutions
Problem: Media Fails at Edges
Symptoms: Tearing or fatigue cracks along hook strip or tensioning rail attachment points.
Causes:
- Over-tensioning concentrates stress at attachment
- Sharp edges on hook strips or rails
- Worn or damaged tensioning hardware
- Uneven tension (high at edges, low at center)
Solutions:
- Reduce tension to specified range
- Inspect and repair/replace damaged hardware
- Verify uniform tension across width
- Consider hook strip liner to reduce stress concentration
Problem: Media Fails at Center
Symptoms: Fatigue cracks, holes, or excessive wear in center of deck panel.
Causes:
- Under-tensioning allows excessive flutter
- Uneven tension (low at center, high at edges)
- Center support bar missing or improperly positioned
- Excessive material load in center
Solutions:
- Increase tension to specification
- Verify uniform tension distribution
- Add or reposition center support bars
- Review feed distribution system
Problem: Rapid Tension Loss
Symptoms: Media becomes loose within hours or days of installation.
Causes:
- Media slipping from hook strips
- Tensioning bolt or hardware failure
- Media stretching beyond elastic limit
- Wrong media type for application
Solutions:
- Inspect hook strip engagement, clean and reseat
- Replace worn tensioning bolts and hardware
- Verify media specification matches application
- Consider pre-tensioned media for high-stretch applications
Problem: Uneven Product Gradation
Symptoms: Product gradation varies across deck width or over time.
Causes:
- Uneven tension across deck width
- Tension loss in some areas but not others
- Media damage in specific zones
- Worn areas creating different aperture sizes
Solutions:
- Map tension across entire deck, adjust for uniformity
- Replace damaged or worn media zones
- Verify deck frame flatness and crown
- Check feed distribution for uniform loading
Tensioning Systems and Hardware
Hook Strip Systems
Hook strips provide the primary attachment for woven wire cloth:
Types:
- Standard hook: Simple, economical, suits most applications
- High-capacity hook: Deeper engagement for high-tension applications
- Quick-release: Facilitates faster media changes
- Heavy-duty: Reinforced for thick wire or heavy loads
Maintenance:
- Inspect for wear, cracks, deformation weekly
- Clean debris from channels before media installation
- Replace when hook depth worn more than 25%
- Verify mounting to deck frame secure
Tensioning Bolt Systems
Tensioning bolts provide adjustable tension at one end of the media:
Design requirements:
- Fine thread pitch for precise adjustment
- Corrosion-resistant material
- Lock nuts or lock washers to prevent loosening
- Even spacing across deck width (200-300mm typical)
Maintenance:
- Lubricate threads monthly
- Check for stripped threads or damage before each use
- Replace if adjustment range exhausted
- Verify lock mechanism function
Tensioning Rails
Tensioning rails (or bars) distribute bolt force evenly across media edge:
Inspection points:
- Straightness—bowed rails cause uneven tension
- Edge condition—burrs or damage cut media
- Mounting holes—elongation indicates overloading
- Corrosion—weakens rail, damages media
Deck Frame Considerations
Frame Crown (Camber)
Many vibrating screen decks have designed-in crown—a slight upward curve at the center:
Purpose:
- Compensates for frame deflection under load
- Helps center media tension distribution
- Improves material flow to edges
Crown and tensioning:
- Media must follow crown contour
- Under-tensioned media lifts off at edges
- Over-tensioned media lifts off at crown
- Check crown height during inspections (typically 5-15mm per meter of width)
Frame Damage Effects
| Frame Condition | Effect on Tensioning | Action Required |
|---|---|---|
| Bent side rails | Uneven edge tension | Straighten or replace frame section |
| Lost crown | Center lifting, edge overload | Restore crown or add compensating support |
| Crack in frame | Local stress concentration, media failure | Weld repair with proper procedure |
| Worn cross-members | Media sag between supports | Add supports or replace members |
Optimizing Media Life Through Proper Tensioning
Establishing Baseline Performance
Track media life to measure tensioning effectiveness:
- Record installation date and tension settings
- Document re-tensioning dates and adjustments
- Note failure mode when media is replaced
- Calculate hours of operation per media set
- Trend media life over multiple installations
Target performance:
| Media Type | Typical Life (poor tensioning) | Target Life (proper tensioning) |
|---|---|---|
| Woven wire cloth | 500-1,500 hours | 2,500-4,000 hours |
| Polyurethane panels | 2,000-4,000 hours | 6,000-10,000 hours |
| Rubber panels | 1,500-3,000 hours | 4,000-8,000 hours |
Economic Impact
Calculate the cost of improper tensioning:
Example: 2.4m × 6.0m deck with woven wire cloth
| Parameter | Poor Tensioning | Proper Tensioning |
|---|---|---|
| Media cost | ₹85,000 | ₹85,000 |
| Media life | 1,000 hours | 3,500 hours |
| Changes per year (6,000 hr operation) | 6 | 1.7 |
| Annual media cost | ₹5,10,000 | ₹1,45,000 |
| Downtime per change (4 hours × ₹50,000/hr) | ₹12,00,000 | ₹3,40,000 |
| Total annual cost | ₹17,10,000 | ₹4,85,000 |
Proper tensioning saves ₹12.25 lakh annually in this example—with no capital investment required.
Inspection and Maintenance Schedule
Daily Checks
- Visual inspection for obvious loose areas or damage
- Listen for unusual noise indicating loose media
- Check product quality for gradation changes
Weekly Checks
- Physical deflection test at multiple points
- Inspect media edges at attachment points
- Check tensioning bolt condition
- Verify no foreign object damage
Monthly Checks
- Complete tension measurement with gauge
- Document tension values and compare to previous
- Adjust tension as needed
- Inspect and lubricate tensioning hardware
- Check deck frame condition
Conclusion
Screen deck tensioning is a fundamental skill that directly impacts media life, screening efficiency, and operating costs. Proper tensioning technique—appropriate for the specific media type—can extend media life by 3-4× compared to careless installation. The economic impact justifies the time invested in proper tensioning procedures and regular re-tensioning checks. Establish tension measurement protocols, train personnel on correct techniques, and track media life to verify effectiveness. The difference between 300-hour and 3,000-hour media life is often simply proper tensioning—a skill that pays for itself many times over through reduced media costs and downtime.